
This month’s theme is all about friendship for the Tech 4 Stampers blog hop. I’ve certainly made new friends being part of this group. Friends are so precious. They pick you up when you are down, and you can rely on them to help you when you need it.

The Tech 4 Stampers is a monthly subscription group run by Louise Sims. She mentors and enables members to understand IT jargon and equips them with a fountain of Technical knowledge to build or manage their own websites. It takes the mystery out of “tech” and I’ve certainly grown in confidence thanks to her expertise, patience and guidance. Not only that, I’ve met and made new friends with my fellow “Techs” and love the camaraderie within the group.
Hues of Happiness
Having a brand new Annual Catalogue is a feast for the eyes and it also means that “must have list” will make a big hole in your pocket! It’s like being a kid in a candy store and you can’t decide what to pick! So choosing which stamp set to feature was really quite difficult. I wanted to use the Hues of Happiness Suite on the front cover of the catalogue but it was stuck in transit!
In the UK we had a bit of a hiccup. All orders which were shipped on April 8th during the pre-order period for the Annual Catalogue got stuck in the system. UK Customs had a glitch in their IT system which impacted all the parcels sent on that day and everything simply ground to a halt. (sighs)
That precious stamp set on the front cover of the new 2022-23 Annual Catalogue was in that parcel! Long story short, my precious parcel arrived on Catalogue launch day, May 3rd. I didn’t get it in time to feature for launch day, but at least I can make a card with it for today’s blog hop!
The details
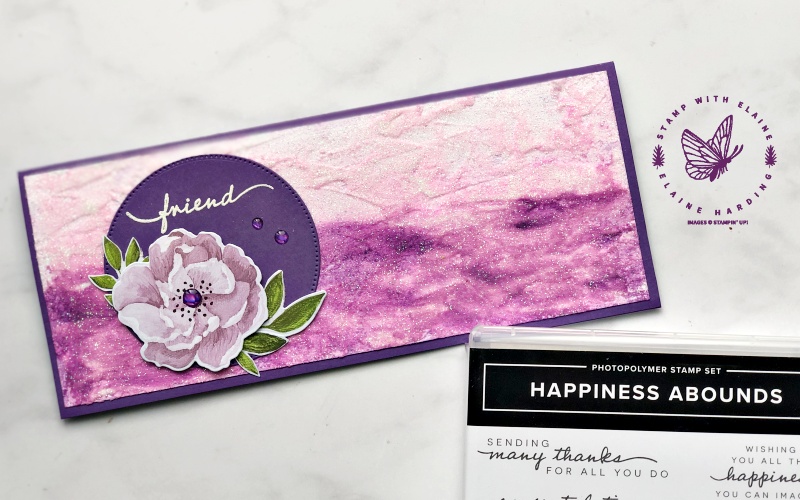
The Hues of Happiness Designer Series paper is absolutely stunning. One side is floral and the reverse side either has geometric designs or an oil paint ombre effect applied with a palette knife. On the floral sheets, there are dies from Blossoming Happiness Dies set to fit the three types of roses and 2 types of leaves featured on the paper. So you see why I didn’t want to cut them up as a background layer. Here’s what I did as an alternative to mimic the oil paint effect.
Some of you might wonder why I didn’t use the Painted Texture embossing folder. Well, I mislaid it and couldn’t find it anywhere. My craft room is a tip with transitioning over to the new catalogue. It was quicker to do this workaround! I did look but to no avail.
By the way, the metric measurements are in brackets.
Card front
- Card base : Gorgeous Grape thick – 8 ½” x 7″ (21.5 cm x 18 cm) , short side score at 3 ½”(9 cm) and fold in half.
- Mat layer 1 card front : Cut a piece of Linen Specialty paper 8-1/4″ x 3-1/4″ (20.5 cm x 8.5 cm)
- Apply a thin layer of Shimmery White embossing paste and cover the whole of the linen sheet with a palette knife. Allow to dry thoroughly before painting.
- Pick up ink with an acrylic block from Gorgeous Grape ink pad. Wet the flat brush tip water painter and paint the lower half of linen embossed layer.
- Clean acrylic block and change ink to Fresh Freesia and paint the upper half of the linen embossed layer.
- Allow to dry thoroughly before adhering to card front.
Die cutting
- Blossoming Happiness dies – die cut the different types of roses and leaves from the Hues of Happiness DSP sheet with the purple and blue roses.
- Use the largest circle die from Stylish Shapes Dies to die cut a circle in Gorgeous Grape.
Assembling Card
Card front
- Adhere the Gorgeous Grape circle to left of card front.
- Apply dimensionals to the largest Fresh Freesia rose and attach to circle.
- Tuck leaves in and adhere to card.
- Stamp “friend” in versamark ink, sprinkle with white embossing powder and heat set with a heat tool.
- Embellish with Glossy Dots Assortment.
Inside card
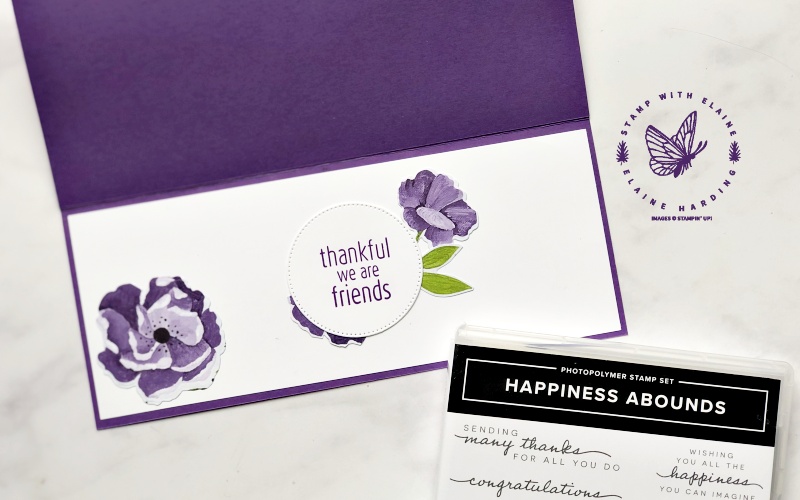
- Cut a Basic White layer 8 ¼” x 3 ¼” and adhere to inside of card.
- Stamp the sentiment on Basic White card stock.
- This step is optional – stamp sentiment (from Framed Occasions) and die cut with 3rd largest circle from Stylish Shapes. You can stamp directly on to the card. I smudged mine so I did this as a quick fix.
- Adhere die cut flowers as desired. Ta da! Finished!
Are you a fan of long slim cards? It’s a welcome change from making standard size cards. I’m so glad the Slimline Envelopes are still with us. They are so much nicer than the DL office ones and it gives me an excuse to create more! lol!
Supply list
Listed below is the supply list. Just click on the picture to take you directly to the item in my online store.
Product List")
")

")

 Designer Series Paper")
 Specialty Paper")


Thanks for visiting. I would love to know what you think of my project and would appreciate it if you could leave a comment. To visit the next person on the list and see their fabulous creations, simply click on the link below or before my name depending who you visited initially. Happy hopping!

Use my 2024 May Host Code 2H4CUTKC. All orders over £40 will receive a special gift from me. Ordering over £150? Keep the rewards for yourself & still get my gift!
- SHOP ONLINE
- Purchase a Starter Kit: Get £155 worth of products for only £99. Choose from current catalogues and any specials available. Free Shipping. Read more
- Subscribe to my Video Tutorials – click here
Gorgeous slimline card in my favourite colours Elaine. My pre-order also arrived on the 3rd, but I haven’t managed to play with my suite yet. Enjoy playing with all your new goodies
Thank you Sara, enjoy playing with yours too.
such a pretty card Elaine x
Thanks Gina. It was quite satisfying doing something a bit more artsy.
This is beautiful!
Thanks Michele, glad you like it.