 |
Good Morning Crafty Friends!
This week I am playing along with Bruno and Kylie Bertucci's Demonstrator Training Program Blog Hop. I am joining in with a group of demonstrators who are working on building our businesses, all the while, having fun in the process.
I encourage you to hop around and visit the other demonstrators on this hop, I know they will appreciate it especially if you leave a comment to let them know you visited.
You will find some fantastic cards, from people who are far more talented than myself. I am sure you will find inspiration and enjoy yourself too.
 |
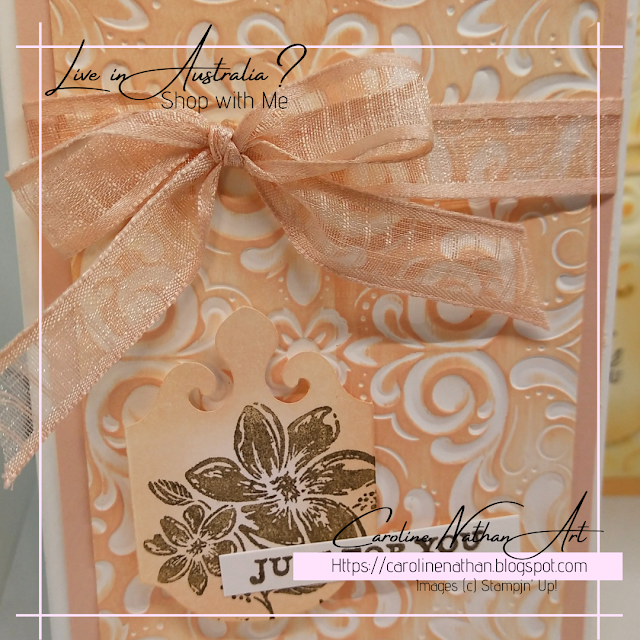
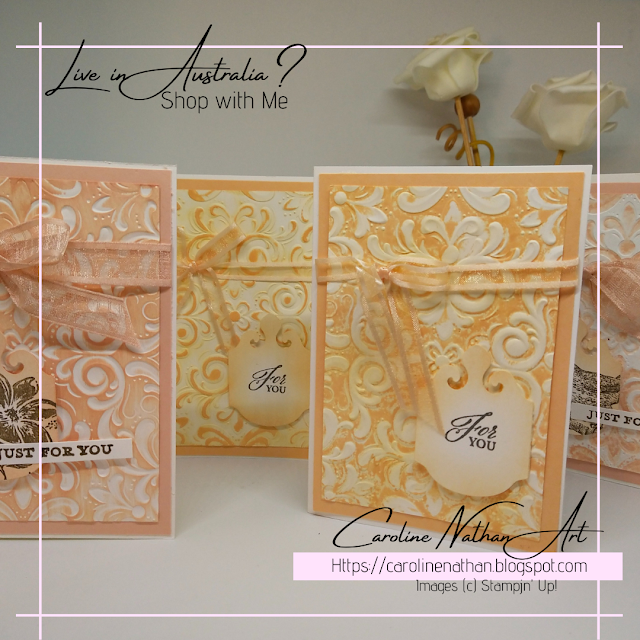
How beautifully did these turn out! I used Parisian Flourish 3D embossing folder and Blushing Bride and one of the new In Colors Pale Papaya. Each card is only 2 colours, White and either Blushing Bride or Pale Papaya. They are surprisingly simple cards too!
 |
| Sample of swiping Stampin Pad on indented side of the embossing folder which highlights the flourishes, left white, once they have been embossed. |
For the first two of the cards I made, I swiped the indented (top/Stampin' Up!® symbol) side of the embossing folder with my Stampin' Pad for one embossed piece and for the other embossed piece I swiped the raised (bottom) side of the embossing folder.
I then placed my 13.4cm x 9cm whisper white cardstock into the embossing folder and closed it carefully so as not to have the piece cardstock move whilst inside it, and then ran it through the Stamp Cut & Emboss Machine (SCEM).
For the other 2 cards I made, I ran the Whisper White 13.9cm x 9cm cardstock through the SCEM to emboss it with the Parisian Flourish 3D embossing folder. After this I used my blending brushes. I gently rubbed them onto the Stampin' Pads to pick up some colour then softly making large circles over the embossed cardstock offloaded colour. One I coloured the raised embossed side and the other piece I coloured the debossed side.
Once I finished having fun making the embossed pieces, I used multipurpose glue to adhere them to a 14.4cm x 10cm piece of matching coloured cardstock. I bound a piece of ribbon & bow around the top of them, and then adhered that to the Whisper White base card.
I punched a piece of Whisper White cardstock with the Elegant Tag Punch and then again used the blending brushes to softly add some colour around the edges of them. Finishing them with either a sentiment in Basic Gray Stampin' Ink or a small sweet image. I used the Etched in Nature Stamp Set and Soft Suede ink. I adhered them to the front of the card with Dimensionals to give them a lift! excuse the pun!
Now that you have seen my cards, make sure you visit all the other Demonstrators. I know you're going to be so inspired after viewing their amazing creations, you are currently with Caroline Nathan at Caroline Nathan Art:
If you live in Australia and are looking for a demonstrator to shop with or join under, I would love to help you and support you in your creative journey. You can find all the products used to make these cards in my Stampin' Up! store or here are the links to them.
I do have to say thanks for stopping by to look at my creations. I hope you enjoyed your visit. Please comment below and let me know you have been here. I look forward to seeing you all again soon.
Well, that's it for now. Have a great week and make some time for crafting.


The embossing is the star of these lovely cards! Thank you Caroline for taking part in our Demonstrator Training Program Blog Hop this month.
ReplyDeleteI had fun taking part in your Demonstrator Training Program Blog Hop. Thanks for organising it. The cards were fun to make too.
DeleteBeautiful card, Caroline. I love how you used the punch to make a window card on the other cards.
ReplyDeleteThank you so much Theresa. Very Kind.
DeleteBeautiful cards. Love the inked embossing folder technique.
ReplyDeleteThanks for visiting and leaving your very kind comment Lorraine.
DeleteLove this technique Caroline! My fav is papaya 🙂. Thank you for reminding me of this simple and beautiful technique!
ReplyDeleteThank you Lesley for your kind words and for visiting my blog. I love the new Papaya, but I am still struggling to not love Blushing Bride. It was fun making these cards. I hope I have inspired you to play with your embossing folders again.
DeleteLovely cards Caroline, I love the inked embossed background x
ReplyDeleteThank you for visiting my blog Mo and your kind comment. This technique was fun. I think my favourite was using the blending brushes after embossing.
DeleteBeautiful cards. Lovely embossing
ReplyDeleteOh Thank you so much Sandy. You are very kind. Thanks for visiting.
DeleteLovely Cards! Fun use of color on the embossing folder!!😊
ReplyDeleteHi Christy. I hope you had fun jumping around the blog hop this month. Thank you for taking the time to comment on my post and cards.
ReplyDelete