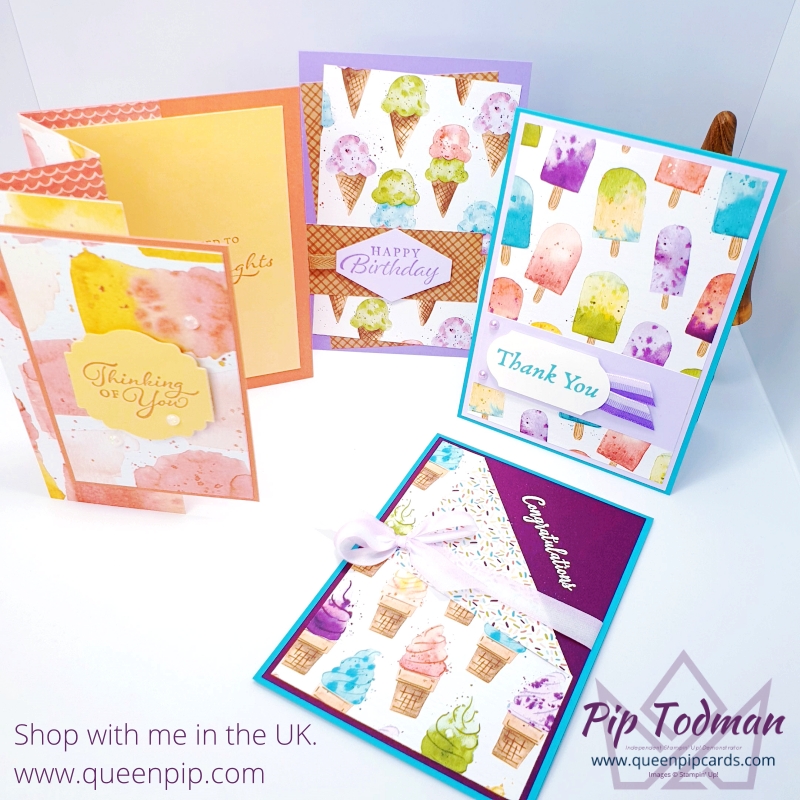
Fun Fold Cards With Ice Cream Corner! Whoo-hoo, time to join this amazing group of international demonstrators for this month’s hop. This month’s theme features The Ice Cream Corner papers! Therefore it had to be fun! After all, that’s what Ice Cream is all about!
Pretty Cards and Paper – Cards With Ice Cream Corner
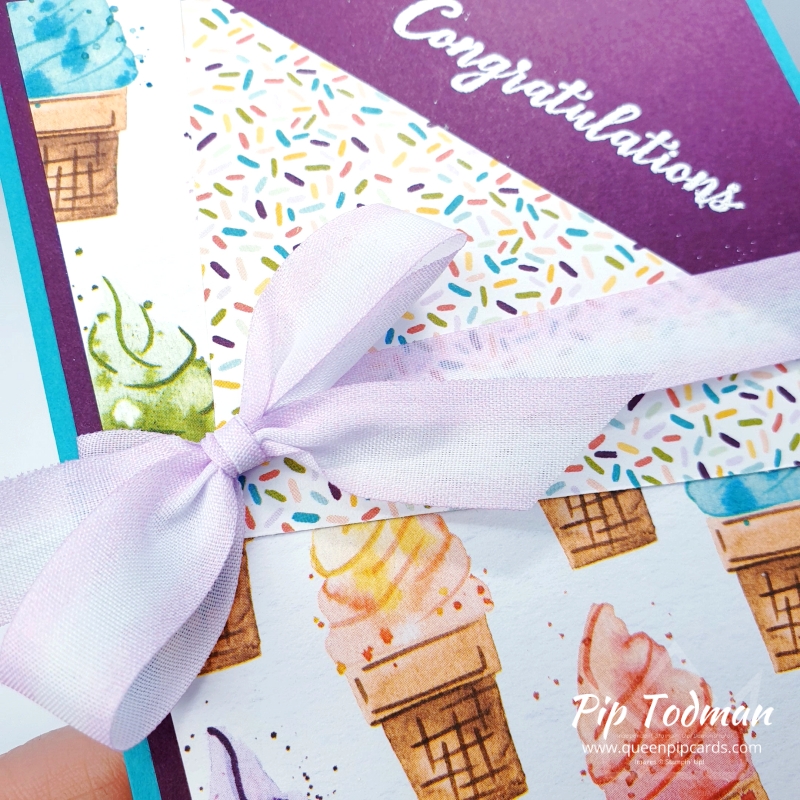
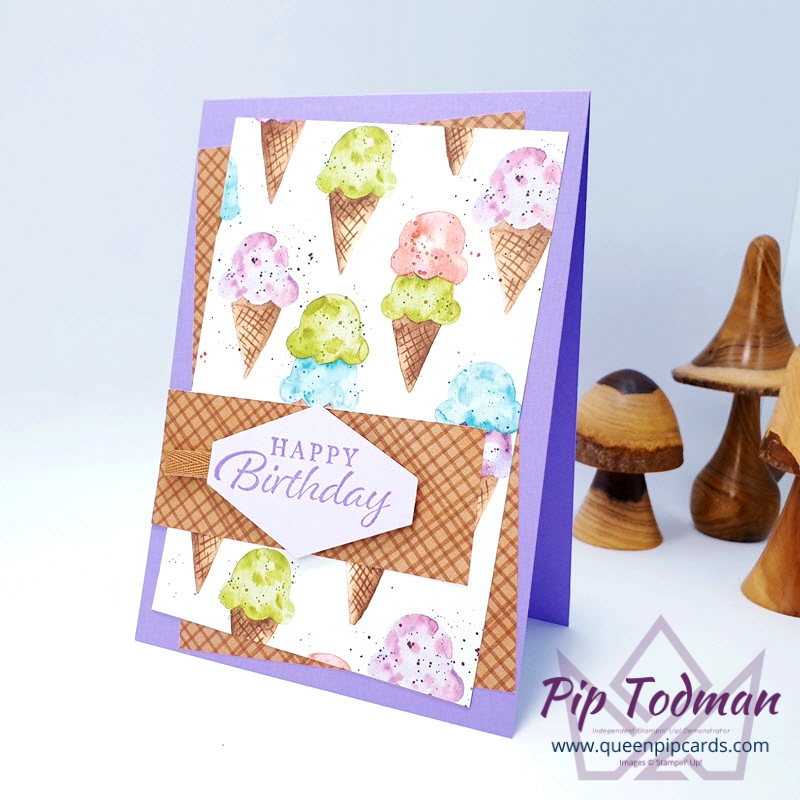
So, for my first card, you just create a fold over on the front sheet of paper so you can see the base layer. In this case because I use Blackberry Bliss I can add some fun with White Heat Embossed Congratulations!

Do you like that? With the pretty bow wrapped around. Makes it have just a little extra zing to what is otherwise a really simple card to make.
My second card today is one I shared with my Silver Plus Team Reception last night! Oh we had fun! I sent them all some Ice Cream Corner paper and coordinating cardstock and then we played with this design. (After we had all had an hour cooking class making fritters & brownies!! Such fun!)
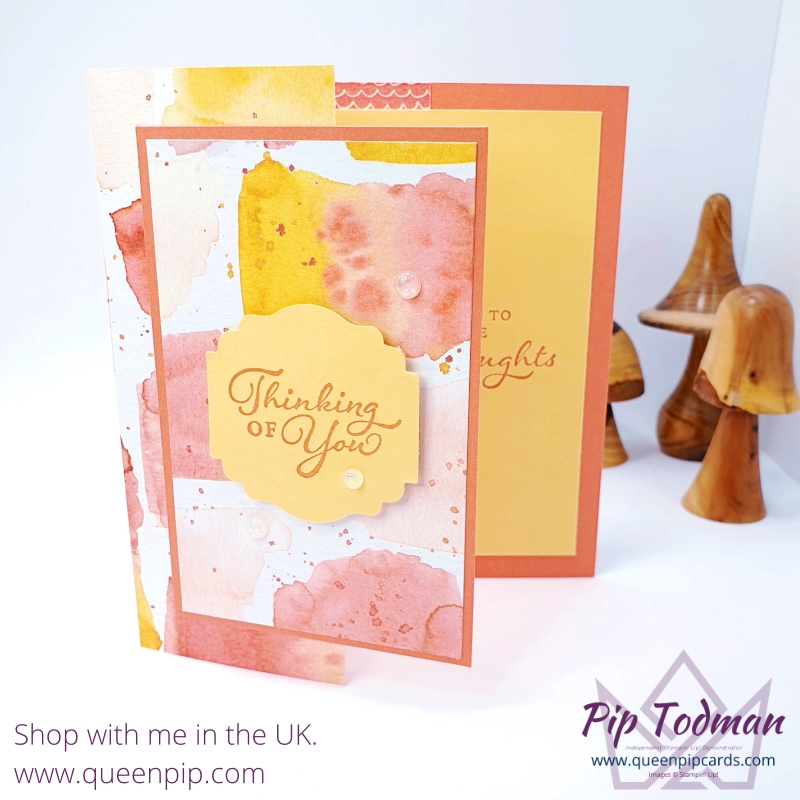
It uses nearly half a sheet of paper, but it really shows off both sides, which is something I like. Normally you have to give up one side when you glue your paper down, with this you don’t have to! I love making fun fold cards with Ice Cream Corner because the paper is so fab on both sides!
Measurements
Take a sheet of The Ice Cream Corner Designer Series Paper and cut it down to 21 x 14.9 cm. Then score at 5, 10, 15 cm. Glue the 5 cm panel to a piece of cardstock 14.9 x 10.5 cm as shown below (so it’s half card & half paper). Fold the papers concertina style and then decorate the front & the inside with cardstock panels! You could even decorate the inside folds if you wanted to!
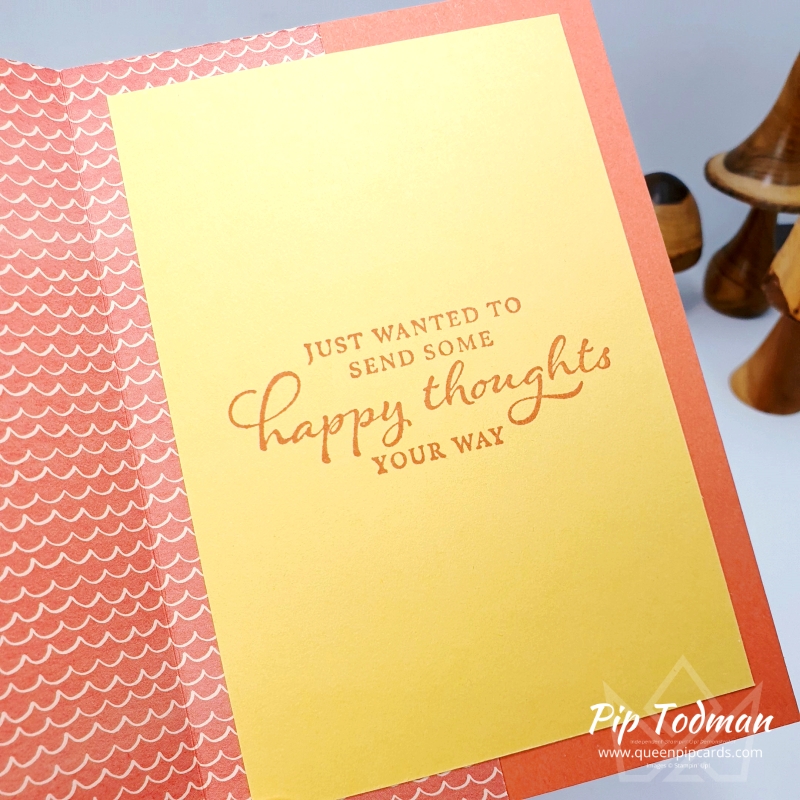
Do you like the sentiment and the words inside the card? Well, this stamp set Happy Thoughts was designed by Stampin’ Up! with the help of our very own Jackie Bolhuis when she hit her 1M sales milestone! Woo hoo, Jackie, this is a great stamp set and I LOVE it! If you do too, let me know COMMENT HERE! I love that you can fit the main sentiments into our punches, I love punches! Great for new card makers!
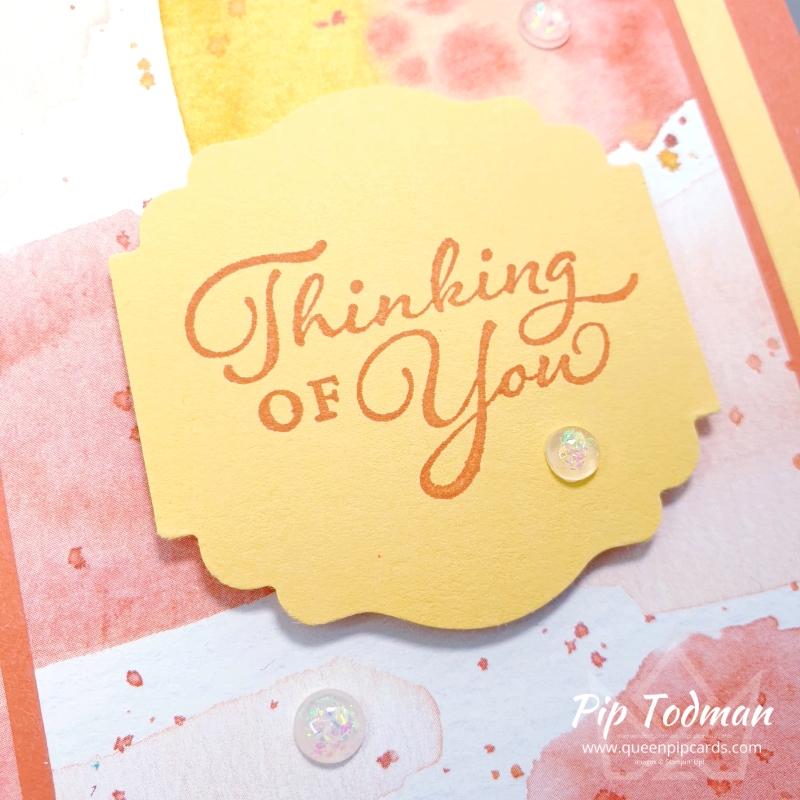
The other two cards that are shown above I have shared in other posts this week, on Facebook, and here on the blog!
If you live in the UK and don’t have a demonstrator, you can purchase all the products from my online store (see below for a list of what I used today!)
Please hop around and see the other wonderful designers from all around the world. The one thing we have in common? We all love pretty cards and paper! So, these monthly blog hops will specialise in featuring these products for you.
See the rest of the team below!
International Blog Hop Team
Want to make this at home? Need everything? Just click the link at the bottom of this list that says “Add all to cart” and yes, you guessed it, you’ll add them all to your basket in my online store. But if you only need a few, just click the one you want and it will take you to that page in my store. Note that Suites contain the bundle, paper, and embellishments.
Don’t forget you need to add this month’s Host Code to not miss out on some delish digital surprises (just don’t add it if your order is over £150, you keep your own Rewards and you’ll still get a nice surprise!).
Or click here to browse my online store & buy your favourite products now!
- Choose a FREE item from our Sale-a-bration catalogue for every £45 or £90 you spend in either of the catalogues! No LIMIT!!
- Order £275 or more (on one order) and you will also receive the EXCLUSIVE Punch Party stamp set for FREE!!
- Spend over £50 and get 62 Tutorials FREE in my Mega Dandy Garden Bundle!
Subscribe to my Newsletter and receive the PDF Tutorial for this card free! Plus a bunch of other great stuff!
I hope you liked today’s projects. If so, come back again every week for more inspiration from me!
Crafty hugs, Pip x
Get A Gift For Shopping
Don’t forget you need to add this month’s Host Code to not miss out on some delish digital surprises (just don’t add it if your order is over £150, you keep your own Rewards and you’ll still get a nice surprise!).
Click HERE to Join Stampin’ Up! for just £99. Choose £130 worth of product and don’t pay shipping! Plus 20% off for at least 3 months! WOW what an offer. Join my fabulous team the Royal Stampers today or Click here to read about us!
Such wonderful cards! Love them all
I absolutely LOVE your cards. Follow the blog hop faithfully and this time I fell in love with your sweet ice cream fun fold card. But I have a huge favor to ask. When you give measurements they are metric and I am ignorant about converting them to US measurements!!! Do you know if there is a chart I could download or could you possibly also put those dimensions (maybe just a parenthesis after the metrics?) on your instructions? Even if not, wanted to tell you how much I like what you create!!!
Hey Katie, thank you so much for your kind words – I am so happy that you enjoy my designs! I made the decision not to do conversion measurements because our base cardstock is a different size to yours. So if I do a straight conversion, it wouldn’t work with your cardstock shape & size. I will look to see if there is an easy way to convert, but I’ve not found one yet – the only way to really make sure it’s right is to make up another card in US cardstock measurements & then work it out that way! Sadly I just don’t have the time to do that for every card I make. I can tell you that this is about 3/4 of a piece of paper & it needs to be the same height as your card stock – which is just a 1/4 piece of your card. Then fold about every 2″ to get the fold, but leave the front one slightly longer – so maybe you would do 2″, 4″, 6″ but have a 7″ piece of paper?!? I hope that helps? I recommend trying it out with some old card & paper you don’t like first! Hugs, Pip x