 I almost didn’t make a card today. It’s been a stressful day (and actually the weekend was pretty stressful too!) and I was really tempted to skip the card making, which is stupid because I find card making quite stress relieving. Anyway, as you can see I did end up going ahead and making the card and I’m so pleased that I did.
Challenge-wise my starting points were My Favorite Things‘ sketch challenge, which combined wonderfully with Cute Card Thursday‘s challenge to use a banner or flag, and the nautical theme challenge from Mod Squad. I also included the colour scheme of red, white and blue from Simon Says Stamp Monday, the create your own background challenge from The Sisterhood of Crafters, and “I for Ink it Up” from Alphabet Challenge. Plus I threw in some anything goes challenges from 4 Crafty Chicks, Simon Says Stamp Wednesday, Dragonfly Dreams, and A Bit More Time To Craft.
 Initially I had no idea where to begin. I didn’t have any nautical themed papers, and my stamp supplies are extremely limited. I searched Pinterest for nautical themed cards to get ideas and decided I really wanted some striped paper. Not having any of my own, I decided to make some! I used my paper trimmer to cut narrow strips of dark blue paper which I stuck into place on a piece of white card, leaving a narrow gap between each strip. My paper trimmer is a bit hit and miss sometimes, so some of the strips were a bit uneven. But it worked well enough.
Once I finished cutting the strips the remaining piece of blue card was almost the perfect size to make the mat for the striped panel. I just trimmed the striped panel and the blue card to get them the size I wanted them. I then set them aside.
Next was the flag part of the layout. I cut a rectangle from a piece of white card, and a slightly larger mat from red. I then cut the “tail” into the white card, adhered the flag with my tape runner to the red card and cut the tail in that. I then set the flag aside.
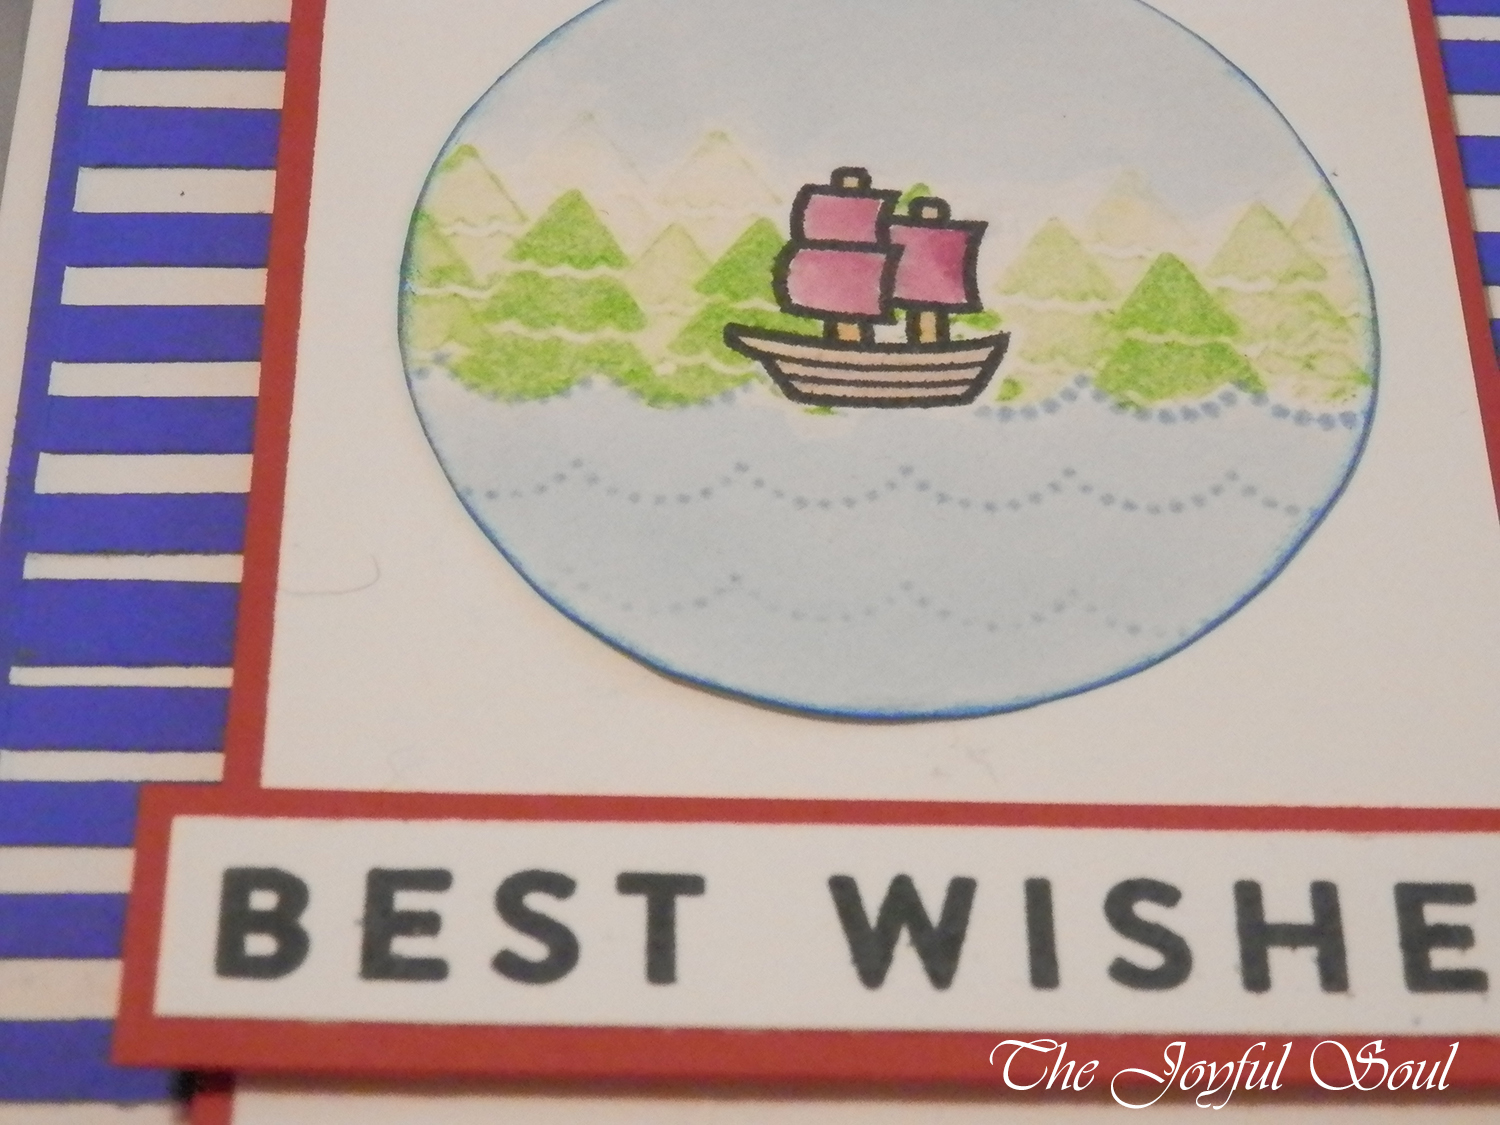
I’ve mentioned before that I really don’t like when sketches have circles. I love circles on cards and think they can look fantastic, but I have no way of making them other than by hand, and that inevitably ends up messy and imperfect, and I’m a bit of a perfectionist so it winds me up! Anyway… I drew around a little tin to get my circle and then used scissors to cut it out. As expected it did not end up lovely and circular but, eh… it’s close enough.
I made my little scene with stamps from Lawn Fawn’s Lovable Legends set, which I absolutely adore. I stamped the boat first using Memento Tuxedo Black, then masked it off. Then I stamped the waves using some very cheap, generic blue (I try to avoid using these inks because they’re a bit useless at times, but as I only have black, purple and orange ‘proper’ inks, sometimes I have to use the cheap ones!) making use of different generations. The top wave line is first generation, the next is second, the next third… There’s even a fourth generation one though it ended up so close to the bottom of the circle that it doesn’t really show.
I made another mask to cover the water, then took another very cheap, generic ink, this time in green, and began creating my tree line. I again stamped multiple generations to give the effect of depth to the trees. I didn’t bother masking the individual trees, though I probably would have done if I was using ‘real’ ink.
I then decided I wanted to pain the scene to fill in the white. I got a little water and my paintbrushes and set to work. First I squished the blue ink onto my acrylic panel, mixed it with some water and applied a wash over the water and sky. I decided to use my Seedless Preserves Distress Ink for the boat’s sails, and then a generic orange-brown ink for the hull and masts of the boat. I then went back over the water and sky with another layer of blue because they seemed too pale.
I wanted to mount the image circle onto another circle. I couldn’t find anything to draw around that was the right size, so I used washi tape to stick the image circle to a piece of blue paper then tried to mimic the line of the circle to make its mat. The result was disastrous. I ditched that idea, and instead edged the image circle with some blue ink to help it stand out from the white of the flag.
The last piece to make was the sentiment. Obviously I didn’t want to cover up the image I’d put so much effort into, so I decided I would move it lower than the sketch calls for. I used my black ink again to stamp the sentiment, which comes from Avery Elle’s Petal Panel, onto a piece of white card. I then created a mat of the same red card as I used for the banner.
Finally it was time for assembly. I’d already adhered the stripes to make my stripey paper using Tombow Multi Mono Liquid glue. I then used my tape runner to adhere that to the blue matting panel, and the blue matting panel to the white card base. The flag and its mat were already adhered together. I used foam tape to attach them to the striped paper. I then used my tape runner again to adhere the image circle to the flag. Lastly I attached the sentiment, which I decided to do with more foam tape, giving an extra bit of pop to the card.
 I am very happy with how this card turned out. Sure, it’s not perfect, but it really ended up so much better than I expected! It’s a card that I’d love to make again, though it may have to wait until I have a better way to make circles… And possibly better inks for the image, too! If I did it in future I would also probably slightly change the image – I think it doesn’t quite look right having the trees just suddenly appearing out of the water. Given what I had to work with though, I am really very pleased!
Love,
Lady Joyful

I think that’s a nice card, like the red, white and blue scheme! Have you used a compass and pencil thing to make circles? I draw round lids but they turn out lumpy..
LikeLiked by 1 person
I haven’t used a compass since school! And apparently I totally forgot they exist… xD I wonder if I’d be able to find one that I could fit my craft knife into where the pencil goes, then I could just cut the circle straight away! Hm, I shall have to look into that! Thanks for the suggestion 😀
LikeLiked by 1 person
I hope it’s helpful, fingers crossed. Nothing more frustrating than a lumpy circle!
LikeLiked by 1 person
Sorry you are having a stressful time, but you are right, making something usually helps! I love this. You produce such great cards with a limited amount of supplies you should be really proud! Trying to get decent circles was the main reason I bought a die cutting machine. I tried circle cutters, but I found them a bit hit and miss. They money I spent on them could have just gone towards a die cutter.
LikeLiked by 1 person
Thanks! I’m really very tempted to buy a die cutter immediately, even though I haven’t saved up for it yet… Doesn’t help that the shop I’m planning on eventually getting it from currently has a 20% off coupon that ends tomorrow!
LikeLiked by 1 person
Clearly you deal with temptation much better than me. I’d be down there with my credit card!
LikeLiked by 1 person
I’m considering it! But the big cross country move coming up is eating most of our money, so there’s that to consider. I’m having a play with our budget to see if I can make it work 🙂
LikeLiked by 1 person
Fingers crossed!
LikeLiked by 1 person
What a cute card. I’m so glad you took some time to relieve a little stress and create! Thank You for joining in the challenge over at Mod Squad! Have a better day! ❤ 🙂
LikeLiked by 1 person
Thanks!
LikeLike
Gorgeous card I love the whole nautical theme of this and the layout is fabulous! Great card! 🙂
I find crafting a great stress reliever too, hope you’re OK now xx
thanks for joining us on the Simon Says Stamp Monday and Wednesday Challenges
luv
Lols x x x
LikeLiked by 1 person
Thank you so much Lols 🙂 Feeling much better than I was!
LikeLike
Super cute CAS card!! Hope all is well xoxoxo Thanks for joining us at 4 Crafty Chicks this week xoxoxo
LikeLiked by 1 person
Thank you 🙂
LikeLike
Lovely card, Thanks so much for joining us at The Mod Squad Challenge
LikeLiked by 1 person
Thanks!
LikeLike
Awwww what a fabulous creation! Thanks so much for joining us at The Sisterhood’s ‘CREATE YOUR OWN BACKGROUND’ challenge and please come back again soon!
Darlene
one of the ‘Sistahs’
The Sisterhood of Crafters
DAR’S CRAFTY CREATIONS Please come for a visit!
LikeLiked by 1 person
Thanks Darlene 🙂
LikeLike
I am back again Charlotte!! Guess what!! you just won the $50 voucher on the Simon Says Stamp Wednesday Challenge! Woo hoo!! 🙂
Congratulations
luv
Lols x x x
LikeLiked by 1 person
Oh, that’s so exciting! 😀 Thank you so much!!
LikeLike
This is such a fabulous card! Thank you so much for sharing with us at Simon Says Stamp Monday Challenge. 🙂
LikeLiked by 1 person
Thank you 🙂
LikeLike