
Welcome to the Stamping Sunday Blog Hop hosted by Sara Levin. This month, we are featuring one of my favorite products, the Forever Gold Laser-Cut Specialty Paper! These beautiful laser-cuts are so versatile, you can use them year-round. I think they look especially beautiful on holiday cards.

The Forever Gold Laser-Cut Specialty Paper includes 6 sheets (3 each of 2 designs.) Each laser-cut is gold foil on one side and white on the other. One design includes backgrounds and the other designs includes tags, a wreath, and leaves.

For this blog hop, the designers have a choice of creating three cards for beginner, casual, and avid crafters or a card and a 3D project. Since I REALLY need to make Christmas cards right now, I picked the first option:)
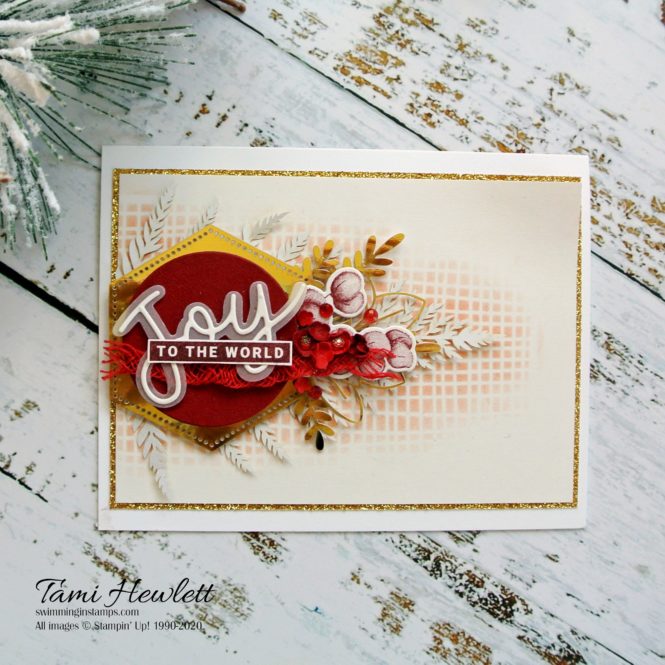
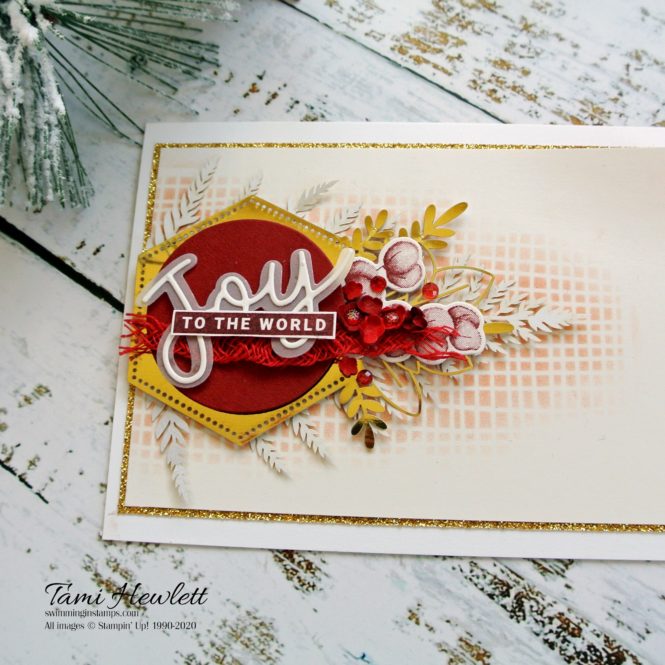
Beginner Crafter:
I struggle a little making beginner cards, but this card involved very little stamping! It’s mostly layers of Forever Gold Laser-Cuts.
(Please note: I realized after I made ALL these cards that I used Gold Glimmer Paper in the background, which is now a retired product. Sorry for the mistake; just pretend it’s Gold Foil, OK? It would look very similar.)
I used a sheet of Shimmery White Cardstock in the background of all my cards measuring 5-1/8″ x 3-5/8″. Then, for my beginner card, I used simple sponging to add Petal Pink ink to the layer. The subtle color really helps the laser-cut background pop.
Next, I added a layer of Cherry Cobbler Cardstock over a laser-cut tag , a Merry Merlot greeting using the Peace & Joy stamps, and some coordinating die-cuts from Vellum and Shimmery White Cardstock. Then, the final touch was to add some small flowers punched with the Confetti Flower Border Punch from Real Red and Cherry Cobbler Cardstock. I used the bottom of a small stylist to curl the flowers and then adhered them with Mini Glue Dots.
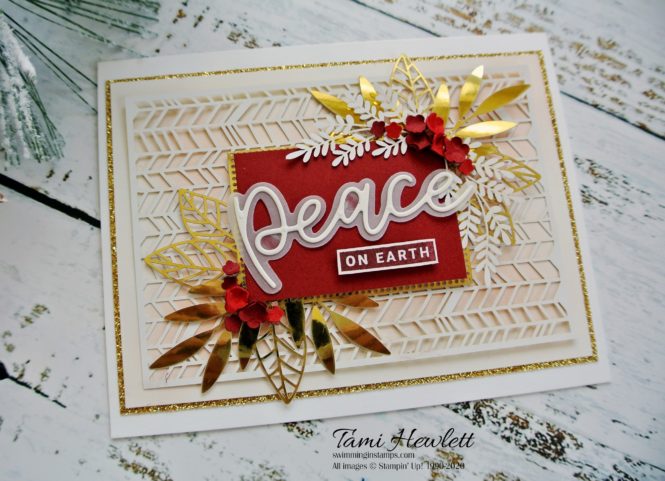
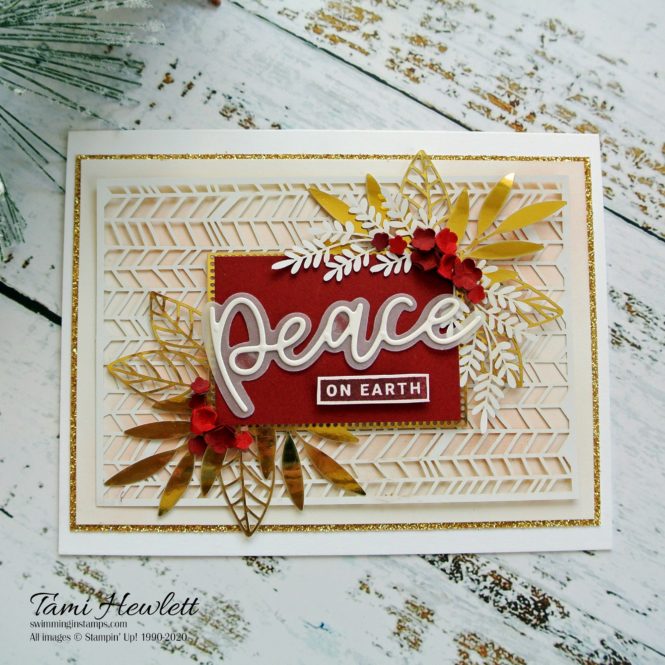
Casual Crafter:
For my next card, I increased the difficulty by using the Forever Laser-Cut background paper as a stencil. I also added some additional stamping and embellishments.
I started by trimming off one side of a Forever Gold Laser-Cut tag and then layering it over the white side of a large leaf laser-cut for a subtle look.
To create the background, I carefully held a Forever Gold Laser-Cut background over the Shimmery White Cardstock and used a Sponge Dauber to add Petal Pink ink. I love how this turned out!

Next, I added a few more layers by stamping the Forever Fern stamp with Cherry Cobbler ink and cutting it out with the coordinating Forever Flourishing Die.
Then, I pulled apart some Real Red Braided Linen Trim, tacked it down under the greeting, and added some Wonderful Gems for a little sparkle!
Avid Crafter:
For my final card, I stepped it up even more with a more difficult background techinque and fancy bow.
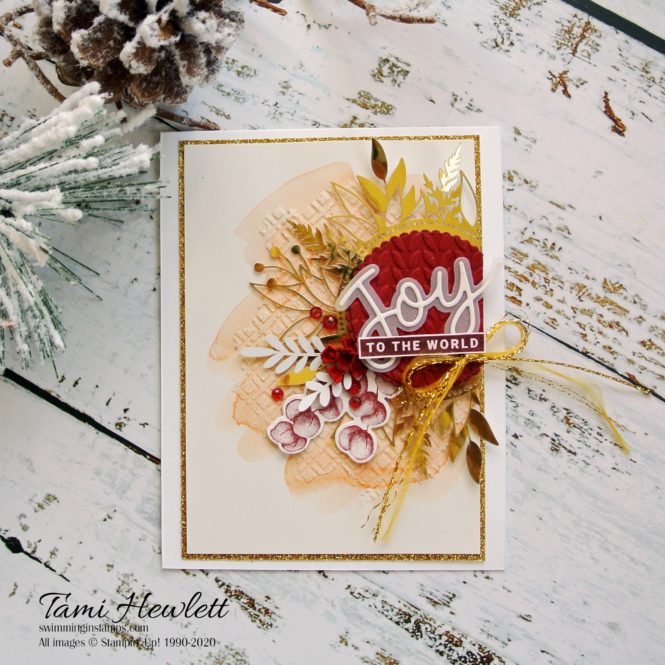
On this background, I started by painting a watercolor wash with Petal Pink ink with my large Water Painter. Once dry, I added some Shimmery White Embossing Paste with a Palette Knife, using a Forever Gold Laser-Cut background as a stencil.

This time, instead of a simple layer of Cherry Cobbler Cardstock over the tag, I used the Greenery Embossing Folder to dry emboss it.
Finally, I took some Gold Cord from the Wonder of the Season Ribbon Combo Pack, unraveled the strands, and tied a pretty bow.

I hope I’ve inspired you a bit. There are so many fun ways to use these beautiful laser-cuts.
Have a wonderful and creative day!

Click on the links below to continue through the Stamping Sunday Blog Hop and see the rest of the designers’ projects featuring Forever Gold Laser-Cut Specialty Paper. I bet this is going to be great!
Use Host Code 9FFPH2AC for purchases at my online store to qualify to receive free exclusive project tutorials and a special thank you card from me. The latest PDF features 10 creative tutorials, including many Fall and holiday themed projects, that are sure to inspire you! (Please note that Host Codes are only valid for 30 days. You can always find the current Host Code on the right side bar of my blog.)


")

")


 Braided Linen Trim")


Beautiful cards as always Tami. Love the textures and layers on all three
Thanks so much Jay!
Fabulous creations, Tami! The backside of the laser-cut paper is great too!
Thanks so much Su!
WOW. Beautiful cards! And so creative and artistic. Love them!
Do you have any tips for using the Forever Gold laser cut pieces as a stencil? Did you use gold side down?
Congrats on your big news! I am a big fan!
Hi Cindi! Thanks so much for your sweet comments. I plced the gold side face up, but I think either would work the same. I just held it carefully with my hand and used a Sponge Dauber to dab directly on top. I didnt rub in other words, so the Laser-Cut stayed in place. You could also try securing both the paper and Laser-Cut with washing tape. Hope that helps. ❤
These are stunning, Tami! I couldn’t love the way you’ve layered detail more.
Thanks so much Sara! 😍
As always, these projects are amazing Tami! I actually love each of your cards so much I can’t decide between them. Huge congratulations for the weekend’s announcements! So very well deserved! xxx
Thank you so much Cheryll! xxx