I have been giving this brass light fixture, which hangs in my entry, the evil eye for seven years. I finally decided to do something about it. The makeover budget was less than $20.
A favorite blogger of mine, Julia from Hooked On Houses, wrote a post over two years ago in which she gave a similar light fixture a makeover with spray paint. I gave it serious thought. For two years.
I really wanted to try and turn my fixture into a French lantern. Like this:

Or this:

I was even willing to settle for something like this:

After two years, countess garage sales, visits to the HFH ReStore and a trip to France (which included the Paris flea market) the end result was that not a single lantern could be found in a reasonable price range.
I accepted that perhaps I needed to change my vision. I began to see more and more drum shade chandelier fixtures being used in home design.
Like this:

and this:

Walking around Homegoods I found a lampshade that was the right size and a color I could live with. It was also priced right at $12.99. On the way home I bought a can of Rust ~oleum Hammered Spray Paint in brown (but it looks like oil rubbed bronze) from Lowe’s. It was on sale for $4. The 8 foot ladder was brought in from the garage and into the house. I had to enlist the services of brave Mr. Décor, because even standing on the top rung (I know, I know) he could BARELY reach the lamp.
But we got it down.
From there I took that baby apart. It was surprisingly quick. Mr. Décor asked if I couldn’t find a bigger wrench for the job. Yes ladies, I did let him live because I needed him to hang the lamp back up.
The lamps construction was like a series of building blocks that you just kept taking apart and going on to the next level. Kind of like a video game for DIY’s.
To get the actual light fixture out of the glass I had to turn it sideways. It took me a few minutes to figure that little gem out before the light popped on in my head (pun intended) so I thought I would save you the trouble.
I then tried on the new lampshade to see if
A. It would actually work.
B. The size was correct.
Please notice that the lamp shade itself is wrapped in plastic. This is an important detail.
I stuffed wads of toilet paper (high class) inside where the light bulbs go and tapped it off for good measure.
Now, even though the lampshade had temporary plastic wrap covering it, I was EXTRA careful and also wrapped the shade in newspaper since I had to spray paint the metal arms. Please also make note of this attention to detail.
Tree huggers: don’t worry, the old glass fixture is being repurposed as well, but we’ll save that for a future post.
Since I live in Phoenix I had to get up at the crack of dawn (before it was blistering hot) to spray paint the metal. One trick that I have learned is immediately after painting, take two fingertips on one hand and hold a thin bamboo skewer in the other and lift the pieces off of where you have just sprayed. Then they won’t stick to the paper.
At the end of the day everything was painted, dried and re hung. While I would have loved to put a fabric cord cover over the chain, my fireman brother had strongly advised me (and now all of you) not to.
You would think I would have been be delighted. Nope.
Remember how the lampshade was wrapped in plastic AND covered in newspaper before I spray painted it? When I took off the paper let’s just say I felt like the gal who has just discovered that in spite of taking two separate precautionary measures she is somehow preggars. (No comment on how I know about that. :)
Two interior paint smudges. Grrrrr!
It was even worse at night when I climbed up on the 8 foot ladder to take this shot.
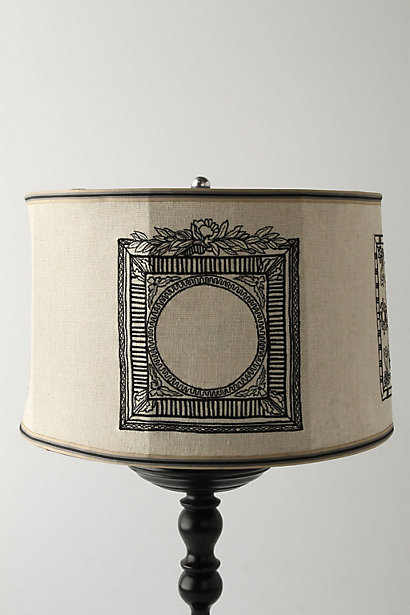
I lived with the shade for several days and then couldn’t stand it and went back to Homegoods to look for another lampshade. I saw a burlap shade with black trim that was so cute, but way too big. As I was standing there pouting, another light bulb popped on in my head. I remembered a lampshade that Anthropologie sold last year. I had wanted it SO bad!
When the lamp was turned on, a silhouette of my oh so lovely Rudi appeared.

I left the store empty handed and raced home. During the drive I thought about what silhouette to use. A doxie, my kids? Since the fixture was so high up I decided upon birds. I googled “bird silhouette” and found a lovely sparrow at Karen’s Whimsy. The image was printed out in various sizes. I considered using sheet music as homage to a bird’s song, but decided to use simple paperback book pages for a more airy feel. My bird dog approved.
A teeny tiny dab of hot glue was placed on the beak, wings and tail and then affixed to the interior of the lampshade over the spray painted boo boo’s. I then added a few extra birds to provide a balanced design.
Here’s the shade in the day with the light turned on …
If the light is turned off, then no birds appear.
I really loved the shade when night began to fall. The birds really stood out.
Given that the light fixture does hang 20 feet into the air I kind of like the extra interest the birds add when you stand directly under it.
I think it’s kind of a sweet tweet.
Have you ever turned a decorating faux pas into something fabulous?
Laura
Hope to see you Wednesday!
Linking to:
Shabby Nest, Romantic Home, Tatertots and Jello, Funky Junk, BNOTP, Today’s Creative Blog, Someday Crafts, Remodelaholic, Tip Junkie
Labels: Creative decor, Feeling crafty