
 I spotted these pretty mason jar soap pumps on DecorSteals.com and immediately ordered two. Unfortunately during the checkout process I was informed that they would not ship to Alaska. UGH! Guess that was fate telling me they really were as overpriced as I thought they were – $29 a pair, plus shipping! I knew I’d pinned a DIY tutorial on how to make the same thing so I figured I’d keep my eyes peeled for pretty mason jars and pumps locally and give it a try.
About a week later my hubby took me to a deviously wonderful antique store he’d spotted while out and about. Where I found these lovlies for just $10 each.

I was twitterpaited. And then like I always do, I got distracted and they sat for weeks, until the day I needed a few items to fill the dishwasher before running a load. Now all clean and pretty and sitting on my counter, they were back on my radar. Luckily, a few days later I made a trip to Pier 1 to use the gift card my mom had gotten me for my birthday and found clear pumps for just a $1 each! Of all the things I might find at Pier 1, that certainly wasn’t one I thought I would, but I’m sure glad I did!

I was in the midst of getting lots of crafts done for an upcoming display so I wasn’t planning on working on this little project until later, but my hubby decided to make it happen and started pulling out tools. I quickly looked up the tutorial I’d saved to show him what the steps were and then followed him out to the garage to get action shots.
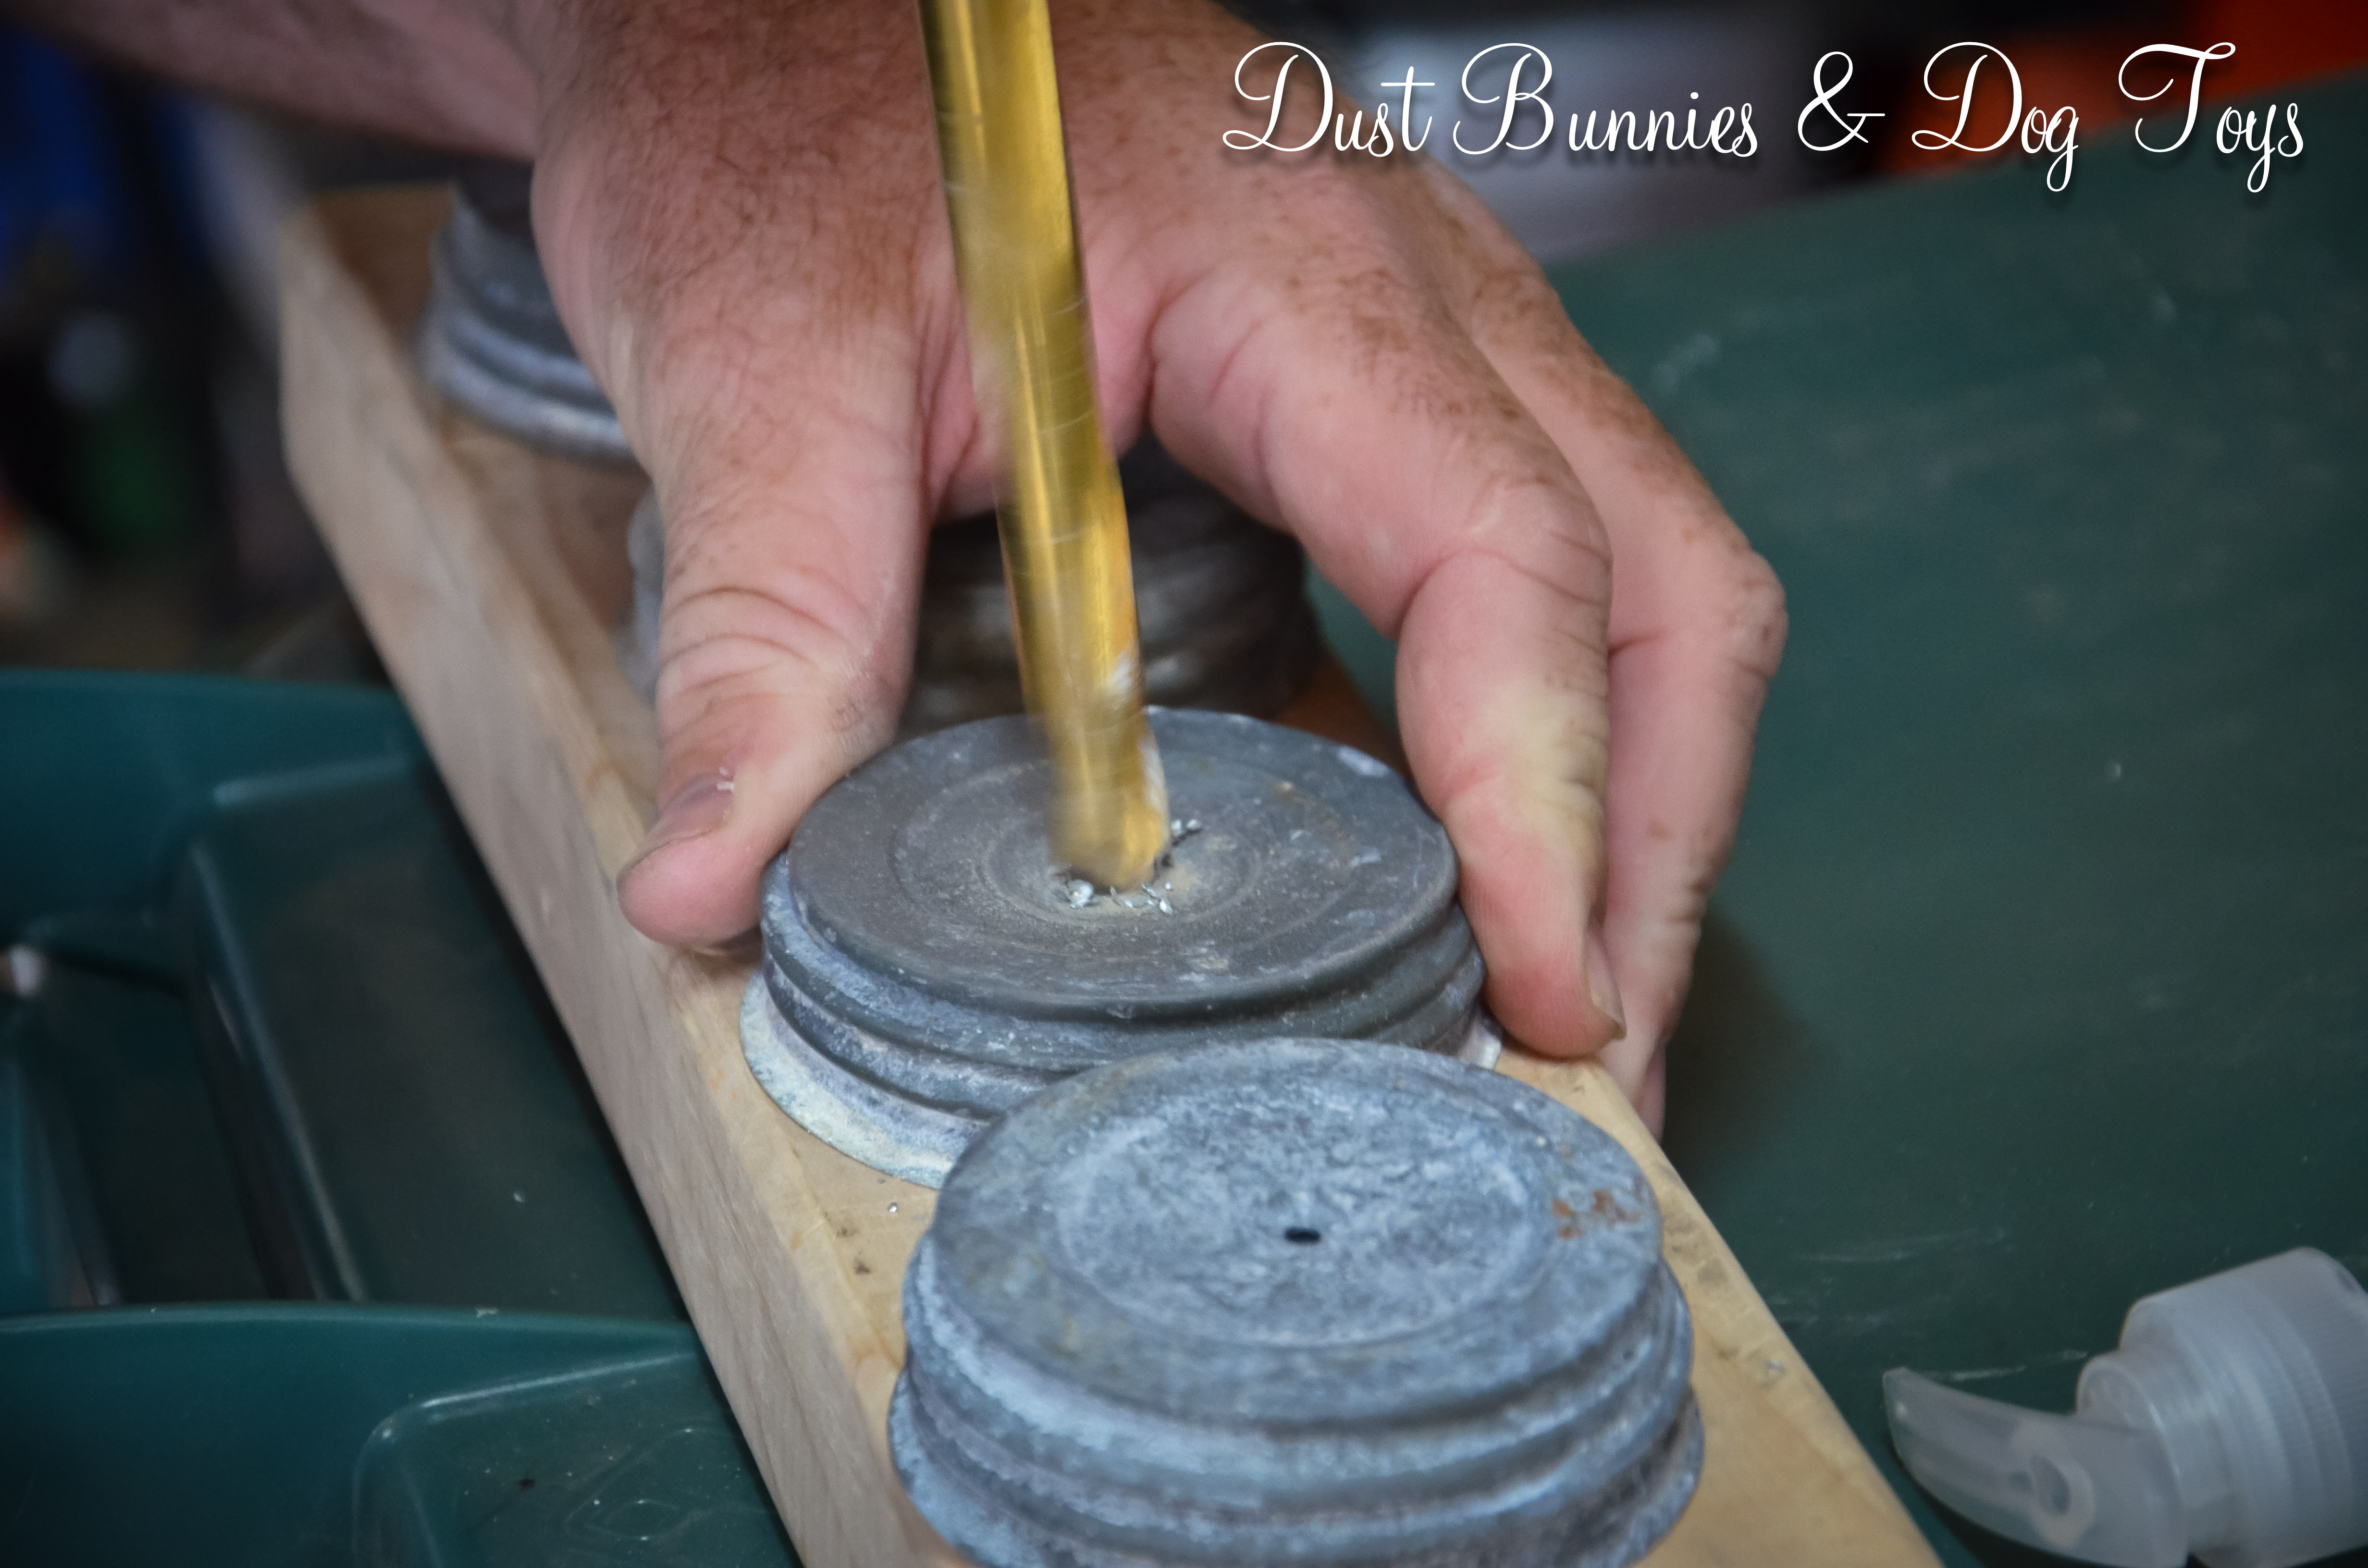
 First he marked the center of each lid with a dot. Then he drilled a hole slightly smaller than the circumference – I love how that word makes me sound smart! – of the pump. He then took a little more off the edges of the hole until the pump would fit into the opening. Here’s the line up of each stage from far to near.
Yes, that is our garbage can being used as a work bench. I’m not the only one who longs for the day we move into our NEW home and start setting things up the way that works best for our needs – including a study work table with tool storage nearby!
At this point I returned to whatever craft I was currently working on and the hubs applied epoxy to each pump and lid to create a seal. We let them dry a day or two to make sure everything cured completely. Then he measured how long each stem should be and trimmed them down to fit.
I filled each with a healthy dose of soft soap from the bulk container I’d purchased some time ago for filling the small single hand pumps we’d had previously and then placed each in their new ‘home’. I love that each is different and has it’s own character.


All together we made four dispensers for $44. That’s less than I was going to spend online without shipping, which makes me like them even better. I think they turned out pretty darn cute and the hubs declared them “the easiest project yet!” He then noted how he was surprised I hadn’t done more for things like lotion, etc. I took that as a clue that he really does enjoy doing these little projects with me and told him I’d be sure to watch for more jars so we could make those daily use items ‘pretty’ enough to display in our new home and then promptly showed him one of my many DIY plans for the master bathroom… 🙂

