

Check out how I made this DIY Vintage Comic Book Wall Art for my guest room decor. My guest room is frequented by my 12-year-old step son. Let me tell you, he LOVES Spider-Man.
My fiancé is a comic book collector, with his prized comics being first appearances. Obviously, I couldn’t afford an authentic first appearance of spider-man, seeing that it sells for $1.1 MILLION!!!! I decided instead it would be super easy to make a faux comic featuring the first appearance of Spider-Man in Amazing Fantasy issue #15.
This project is great for decorating a young guys bedroom or for an adult comic book enthusiast’s “man-cave.” Heck! What am I saying? This technique could be applied to so many vintage collectibles. Just find an image that suits your target audience.

Amazing Fantasy #15: First Appearance of Spider-Man (image courtesy of Pencil Ink blog)
Supplies
- Picture Frame
- 15 pages of blank computer paper
- Paper cutter or ruler and exacto blade
- Comic Book Cover Art image
I used an Ikea RIBBA frame, which I actually found in a box in my closet. It used to house a Japanese block print from an old calendar that I had hung up at the old apartment. It never got re-hung up, so I decided to repurpose the frame. I like how this frame is matte black and boxy like a shadow box. Perfect for framing our faux comic book.
Steps
Gather Your Materials and Find Your Image:
I did a Google Image Search for “first appearance of spider-man cover art” and found this image at Pencil Ink Blog. What is great about this image is it isn’t the pristine original artwork, but rather a photo of an actual comic. Notice the creases along the spine? I love it!
Print Out Your Cover to Size:
A typical comic book is 6-5/8 inches by 10-1/4 inches with 32 pages. The pages are typically thinner than computer paper, so I did not use the full 32 pages but rather 15 pages. I used some old, grayish paper that I found in a closet while looking for more computer paper. I think my mom gave it to me for resume paper, but I never really liked how gray it is.
I used Microsoft Publisher to make my image the correct dimensions, then printed it out on a color printer. You may need to print it several times, resizing the image between prints, before you get the correct size.
Cut Your Pages:
I stacked up all my pages and used an exacto knife and ruler to trim them using the image as my guide. You could also use a paper-cutter, although I liked how the knife gives the edges an unclean look. When cutting the cover art, make sure to leave some excess on the left hand side to create a faux spine.
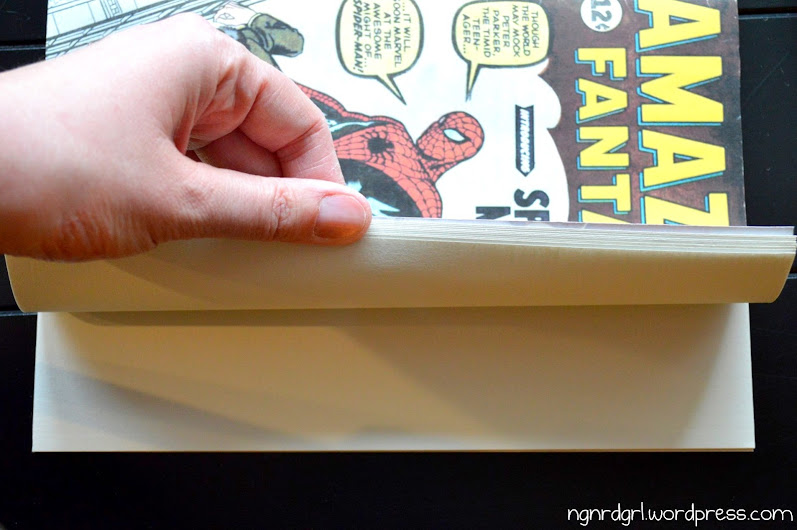
Fold the “Spine” Over the Stack of Pages:
I folded the “spine” over the stack of pages so that the cover actually wraps around the “spine.” I then taped the back of the cover to the last page in my book. Here is how the back looks:

The “spine” is wrapped around the pages and taped to the last page.
Here is how it looks with its blank pages:
Blank pages in my comic book.
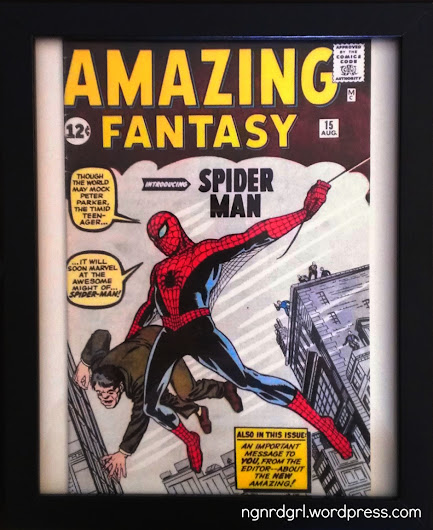
Frame Your Vintage “Comic Book”
The image has a matte finish due to being printed out on computer paper. After you put it behind the glass in the frame, it has a much more glossy look. I used the white matte background that came with the frame. I think the white background helps give it more depth, allowing shadows to form around the “comic book.”
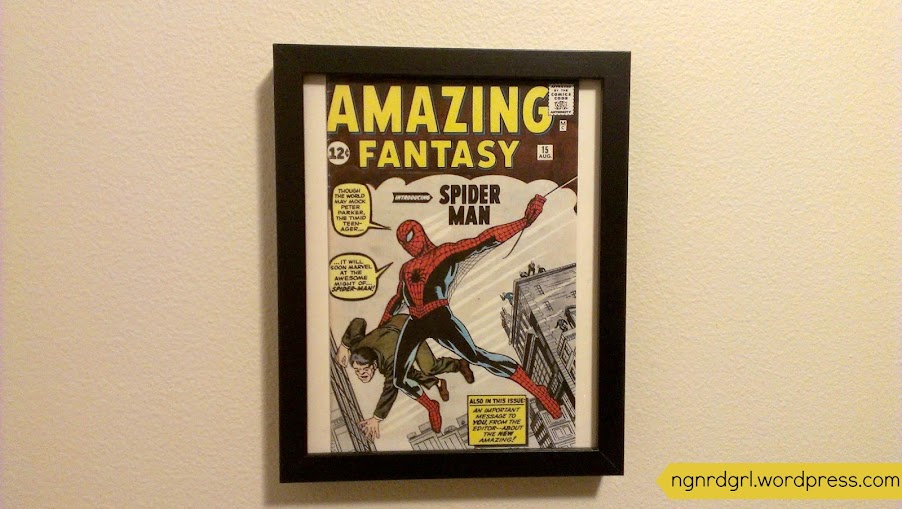
Results
I had originally planned on aging the pages of the “comic book” by using coffee or tea. However, I didn’t end up doing this and you really can’t see the pages while framed. The pages really just give it some depth while framed.
I just love how it turned out:
Resources
Here are some additional vintage comic book cover art that would make excellent wall art:
 Action Comics #1: First Appearance of Superman. This comic has set the record for price paid for a comic at $1.5 Million! (image courtesy of wiki) |
 Detective Comics #27: First Appearance of Batman (image courtesy of dc.wikia.com) |
 The X-Men #1 (image courtesy of SciFiPulse.net) |
What do you think of my DIY Vintage Comic Book Wall Art?

Related Articles
Since you are here, why not check out some of my other posts?
      |
Follow me!
Don’t forget to follow me to avoid missing upcoming articles! You can follow me via email in the widget on the right or follow me via bloglovin’, facebook, google+, pinterest, twitter or rss feed.
Featured on:
Linking to:
Creatively Tuesday | Fun in Functional | Show & Share Wednesday | Live Laugh {Linky} | Talkin’ About Thursday | Freedom Fridays | What to do Weekends | Pin Me | Saturday Nite Special | A Pinteresting Party | Make the Scene Monday | Sharing with Domestic Superhero


Nice comic wall-art.Thanks for sharing.
Pingback: Comics garbage? | Illya King's Blog
Love this! It would be a perfect gift for my uncle for Christmas!
Jenna @ http://rainonatinroof.com
Yay!!! I’m glad you liked it! Thank you! 😀
Wow, I love how this turned out! I nanny for a 4 year old boy and he loooooves superheros! This might be the perfect future gift! Thanks for linking up at Sharing with Domestic Superhero Thursday!
It would make a great future gift! Thanks for checking it out!
This would be really cute for a boy bedroom, thanks for sharing!
It would! Thanks for checking it out!
Cool! Thanks for linking up to my Linky Party!
Thank you for hosting and stopping by. It’s always a great party!
This is interesting. Thanks for showing how. Linda
Thank you for dropping by!
OMG my husband would LOVE this! What a fun idea, and definitely less expensive than the $1.1 million price tag!
You should surprise him with one!!! Yeah, that price tag is crazy!
So, the only problem with surprising him with one is, he proofreads all my posts before I publish them, and I featured this today! He really loved it though, so maybe I’ll just do it as a fun gift instead of a fun surprise. 🙂 Stop by and check it out/grab a Featured button: http://practicallyfunctional.net/2013/03/the-fun-in-functional-link-party-40/
Thank you so much, Jessi!!! I am thrilled! Grabbing a button now!!!
Great idea for a kid room….I love it!
Thank you!!!
How sweet of you to do this for your your step-son’s room and as an homage to your finace’s love of comics! It turned out so great, a part of me wonders if you could do three more and do a lil gallery display…. Just trying to create more projects for you since I know just sitting around twiddling your thumbs (tee hee). LOVE the outcome.
Haha! My fiance looked over my shoulder while I was working on this post. He saw the alternate covers and said, “oh, wow! Are you going to make those too?” He thinks my wall art is pretty awesome. Maybe I will do a gallery. Since you are twisting my arm. 😉